

PAVER DESIGN & PLANNING.
One of our Professional Design Consultants will assist you with your design and plan in an effort to come up with a clear picture as to your overall vision and goals for the project. The design and diagram will determine the scope of the project. At this point we will be able to provide you with an accurate estimate in regard to your investment. We can continue to alter the scope until we meet your project needs. Once the design is finalized we will use the diagram to ascertain the appropriate quantities of material to order.
PRE-DEMOLITION
Before the demolition can commence, all utilities (electrical, gas, water, etc.) must be properly located to eliminate unnecessary problems. (usanorth811.org)

DEMOLITION
A bob-cat (where applicable) will be used to demolish your existing hard-scape surface. In areas where the bob-cat cannot access, other demolition tools will be used to remove the hardscape. Saw-cutting may be necessary along areas where the foundation is protruding into the usable space in the driveway, patio, or pool deck areas.
EXCAVATION
In vehicular areas, such as driveways, we will excavate 9 inches minimum from final grade and in pedestrian areas, such as your walkways & patio, we will excavate 7 inches minimum from final grade.
GRADING
For the first 4 feet away from the house, we will want a 1/4 inch of fall per foot for the first four feet and 1/8 inch of fall per foot thereafter. This is to code and should be followed to create the necessary water flow away from your house.
SUB-BASE COMPACTING
We will use a plate compactor to compact the sub-base. This is crucial as we do not want to have any air gaps in our system. If you skip this step, it will lead to undulations later on.
GEOTEXTILE FIBER
Prior to the base preparation, we will install the geotextile fiber which will inhibit the native soils (your dirt) from mixing with the Class II Road Base, which will be installed next and preventing invasive weeds to grow. One of the main reasons pavers undulate and fail later down the line is because this step is skipped. The fiber retains the integrity of the foundation and system and the foundation is vital to the longevity of the paver installation.
BASE PREPARATION
We will prepare 6 inches of Class II Road Base for the vehicular areas and 4 inches for the pedestrian areas. Once the base has been set, we will hose the base down, and compact it until we reach a compaction level of 95%. At this point if the bob-cat drives over the prepared base, you will not see any tires mark, as it is literally hard as a rock, which is exactly what you want.

SAND PREPARATION
We will screen 1 inch of sharp angled bedding sand over the entire base, which is specially designed for the pavers. This is not round beach sand that you would find at your local beaches. It is sharp and angular in design and locks into the paver joints.
LAY PAVERS
Once the laying system has been completed, we will lay string lines out from your house so that we know we are laying our pavers properly to the design/plan.
CUT BORDER STONES
Once the entire field of pavers has been laid, we will take the border stone of your choice and place it around the outside of the field. Next, we will take a marker (sharpie) and mark all the stones that are in the borders path. Once the stones have been marked, we will take them one at a time to the wet saw and cut each stone to perfection. Once they have been cut we will place the cut pavers back in their appropriate field location.
PREPARE CONCRETE BOND BEAM & LAY BORDER STONES

After all the borders have been cut, we will trench all the areas out underneath the border stones that are abutting up to soft-scape surfaces (i.e. grass, dirt, asphalt, etc.) and trench all those areas out. Once the softscape areas have been trenched, we will pour a concrete footing in the trenches. After the concrete has been poured, tamp down all the border stones into place. Once the concrete finishes drying, remove all excess concrete on the sides.
COMPACT PAVING STONES
We will use the plate compactor at this point to compact the pavers down into the bedding sand, thus bringing the sand 1/4 inch up on the stone. At this point, the stones are now interlocked. We will continue to bring more and more polymeric sand and compact from top down to completely fill all the 1/16-inch paver joints. At this point, the surface of the pavers should be sealed with the polymeric sand so nothing is growing on the surface of the pavers.
CLEAN UP
Once the joints have been completely filled with the polymeric sand, we will start our clean-up process. All excess sand and debris will be removed and your paver project will be hosed off and ready to use immediately. All extra pallets will be hauled away.
SEALER (OPTIONAL)
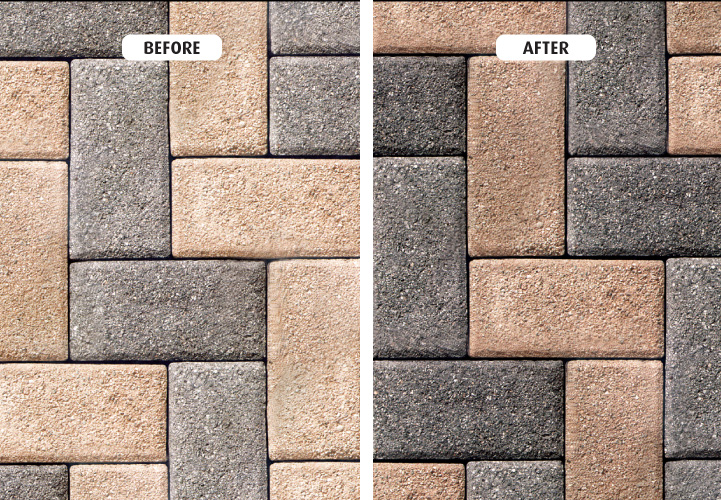
Once the paver project is completed, we will can come back to add a sealer. There are various types of sealers, including: joint stabilizer sealer, color enhancer sealer, wet look sealer, etc.; however, the most popular sealer is the natural look sealer. This particular sealer locks in the joints to help prevent weeds or any other growth from occurring between the pavers. It also helps with inhibiting staining, however, it does not eliminate all stains.
In order to install the sealer, we must wait up to six weeks after the paver installation project is complete. We recommend this because the color injection of the pavers must settle into the concrete stone before we can apply the sealer.